Why isn’t the third light on my Bridge on?
Here’s what to do if you’re experiencing issues setting up your Philips Hue Bridge, and the third light on the Bridge it is not lighting up.
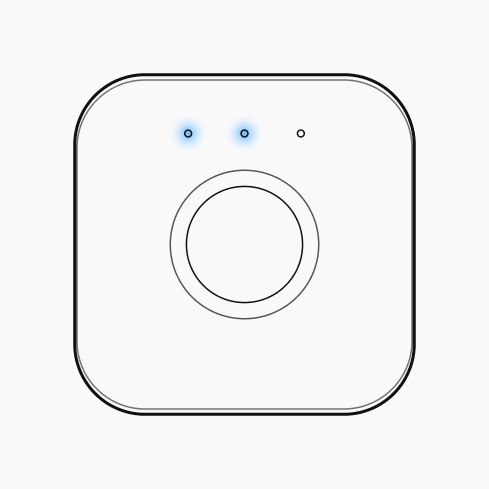
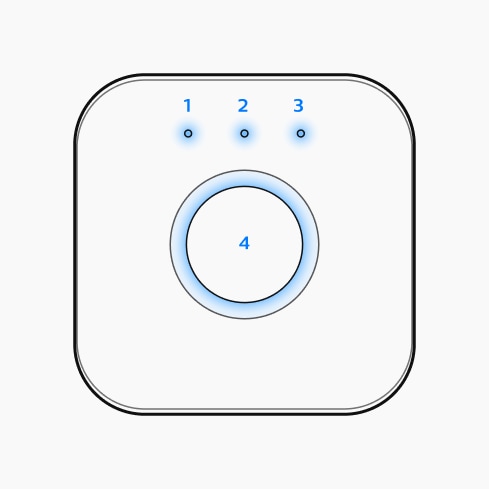
What do the lights on the Philips Hue Bridge mean?
Each of the lights on the Bridge indicate the following status information, from left to right:
- Left light: Bridge is connected to power
- Middle light: Bridge is connected to the network (through a router or modem)
- Right light: Bridge is connected to the Hue internet services
- Round light around button: Bridge is producing a Zigbee signal
Why the third light isn’t coming on
The third light on the Bridge will not turn on if the Bridge is not running the latest software version. You can fix this by updating the Bridge.
How can I make the third light on my Bridge come on?
There are two ways to do this, depending on whether you have your Philips Hue system set up yet.
If you already have the Philips Hue app and have set up your Bridge on it, follow these steps:
- Go to Settings > Software update and follow the app’s instructions to update the Bridge’s software. You may have to repeat this step.
- Once the Bridge has been updated, the third light should turn on.
If you haven’t set up your system yet, follow these steps:
- Make sure the Bridge is connected to both power and to your router.
- Wait until the first and second LEDs light up.
- Download the Philips Hue app. Follow the steps to set up your system.
- When the app asks you to add a Bridge, select Yes.
- In the next screen, tap Search.
- If the app can't find the Bridge, you can search by IP. Tap I need help and then More options. Check below for instructions on finding your Bridge’s IP address.
- Once the app has found your Bridge, follow the app’s instructions to update the Bridge’s software. You may have to repeat this step.
- Once the Bridge has been updated, the third light should turn on.
How to find a Philips Hue Bridge’s IP address
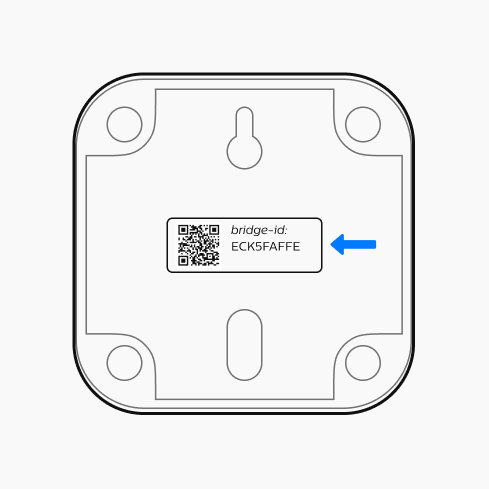
Finding the Bridge’s IP address means you’ll need to look at the devices connected to your router. To do this, you’ll first need the Bridge’s MAC address. You can find this on the back of the Bridge.
There are a few ways to find the IP address:
Option 1: Download a network scanner app, such as Fing. There are many apps like this available in the App Store and Play store.
These apps have different interfaces, but in general they will show you all the devices that are connected to your local network. If your Bridge is connected to power and your router, you should see either a) a device named Philips Hue or b) the MAC address of the Bridge. Next to this, you should see the associated IP address.
Option 2: Access your router’s settings portal.
With this method, you can sign in to your local network router and find all the devices connected to it. Use the MAC address from your Bridge to find its associated IP address.
Option 3: Use the network functionality on your Windows computer.
Open File Explorer. Navigate to the “Network” item in the left menu. After scanning, it will show the Philips Hue Bridge that’s connected to your network. Right click this item and open its settings to view the Bridge’s IP address.
If the above steps do not solve the issue with the third LED light on your Philips Hue Bridge, contact the Philips Hue support team for further assistance.


